0113 249 2222


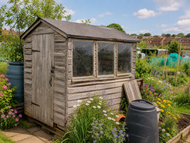
It’s quick and easy to replace your shed windows yourself, without the cost of calling out a tradesperson or buying a new shed altogether.
Today, we’re sharing a complete step-by-step guide on how to replace your shed windows, including the tools you’ll need for the job, how to measure up for new glazing and which material is best for you.
Replacing your shed windows
Your shed sits out in the elements all year round, bearing the harshest weather. It’s exactly why your shed needs to be watertight all year round, to protect the structure and its contents. But whether it’s cracked glass or degrading plastic, poor glazing is often the first part to give in before the rest of the structure.
Following the steps we’ve laid out below will make quick work of replacing your shed windows, whether you’re changing cracked panes or simply upgrading to something more resilient.
Tools
- Gloves
- Safety goggles or glasses
- Tape measure
- Replacement shed window
- Screwdriver
- Drill
- Utility knife
- Screws
- Nails
- Sealant
- Adhesive
- Wood batons – only if you need to replace old, rotten fixings
Top tip: When it comes to fitting replacement polycarbonate shed windows, we’d always recommend screwing them in. This is by far the easiest and quickest method, with less risk of damaging the replacement pane.
You can also order cut-to-size plastic shed windows with fixing holes already drilled, making it even easier to fit your new replacement glazing.
The replacement process
This process will typically take 30 minutes to one hour per window.
Step one: measuring and finding a replacement pane
Before you buy replacement glazing:
- Measure the width and height of the existing window opening on all sides.
- Measure the thickness of the glass if you want to make sure you’re ordering the same replacement.
- Make note of whether you need screws to fit through the new pane or whether they’re just going to be glued or battened in.
- You may choose to remove the old glazing for a more accurate measurement.
Tip: Often, your new cut-to-size plastic shed window will fit into a recess in the shed frame. To make sure you get a snug fit, you should typically take 2–5mm off the opening measurement.
And remember, this is your time to see how the window will fit and whether you’ll need any extra fixings or adhesives depending on how your window frames are constructed.
Step two: remove the old pane
If you haven’t already, then remove the old pane:
- Remove any batons holding the current glazing in place.
- Carefully cut through old silicone or paint with a utility knife.
- Remove screws or fixings that are holding the glazing in place.
- Carefully lift out the pane, leaving the main frame in place.
Top tip: If you’re dealing with an old glass window, then be very careful throughout this process. Always wear gloves and goggles.
Also remember to preserve any fixings or batons as well as you can if you plan on using them again.
Step three: prepare the frame
Prepare the opening for the new pane by:
- Cleaning any old sealant and debris from the opening.
- Inspecting the timber to check it’s not rotten.
- Remeasuring the opening to check you haven’t removed vital pieces of the frame during the removal process.
Top tip: It may be tempting to just get your new plastic shed window in place, but do not skip this step. If you have an old and rotting frame, then you may need to replace parts of the surrounding timber before you fit your new shed windows.
Step four: hold the new pane in place
Before fixing your new shed window in place, put it into the opening without its fixings. Check that:
- The new window sits flush in the opening.
- The screw holes are in the correct place and the screws will fasten properly – if you have pre-drilled screw holes in your cut-to-size window.
- The gaps on each side of the window are even.
Top tip: If you have uneven gaps around the window, don’t panic. You should be able to use spacer wood to pack the gaps.
Step five: secure your window
Now it’s time to secure your new shed windows in place. The way you do this depends on what fixings you’re using, the window frame and how you’ve decided to fit it.
If you have ordered cut-to-size plastic shed windows and have pre-drilled holes:
- Hold the window in place and drill small pilot holes into the timber.
- Use small screws to fix your plastic shed window into place – you may want to also apply a small bit of adhesive first for extra hold.
- Be careful not to over-tighten the screws and damage the plastic.
- Replace any batons or parts of the timber frame.
- Apply a bead of sealant to the edges on the outside to securely weatherproof your window.
If you don’t have pre-drilled holes in your plastic, and you aren’t drilling them yourself:
- Apply adhesive around the area that will meet the timber frame.
- Replace any batons or parts of the timber frame.
- Apply a bead of sealant to the edges on the outside to securely weatherproof your window.
Top tip: Be careful when screwing or nailing any framing or timber after your new shed window is in. Always check you’re not nailing or screwing through the solid plastic.
Step six: don’t forget the finish
Your new plastic shed windows may be fitted, but it’s not quite time to admire your work. If you want a professional finish:
- Fill any visible screw or nail holes.
- Touch up the timber with paint, stain or preservative.
- Now you can admire your work.
Ready to get started? Browse our range of lightweight, robust and affordable plastic shed windows, cut to your exact dimensions, here.
Choosing the best material for your new shed windows
Whether you’re repairing cracked greenhouse glazing or giving your shed windows some love, it’s important to choose the right material for the job. Choosing the right glazing will help your windows last longer, better protect the structure from the elements and keep everything inside your shed safe and dry.
Below, you can compare the most common shed window materials at a glance:
|
Polycarbonate |
Acrylic |
Glass |
|
|
Strength |
Very high strength |
Moderate strength |
Poor |
|
Clarity |
High light transmission |
Very high light transmission |
Excellent |
|
Workability |
High workability |
Very high workability |
Poor |
|
Weight |
Lightweight |
Lightweight |
Heavy |
|
UV resistance |
Moderate |
High UV resistance |
Excellent |
|
Insulation |
Better than glass |
Better than glass |
Good |
|
Typical lifespan |
20-30+ years |
15-30 years |
20+ years |
|
Security |
Excellent |
Excellent |
Poor |
|
Price |
Moderate |
High |
Moderate |
If you’re struggling to choose between glass and plastic shed windows, we’d suggest:
- Choose glass if you want an authentic, traditional look and don't mind the extra weight or risk of breakage.
- Choose polycarbonate or acrylic if you’re replacing standard shed windows. It’s lightweight, affordable, easy to cut and install, and offers excellent clarity, making it the most popular option for DIY projects.
Final thoughts
Upgrading your shed windows is about more than just improving their appearance. A well-fitted window can prolong the life of your shed and everything you keep in it. Best of all, you don't need a tradesperson or a costly hourly rate to do it.
Replacing your glazing with tougher, stronger and more affordable plastic shed windows is much easier than you might think. Just follow this simple step-by-step guide and let us know how you got on.
At The Plastic People, we help people find the right cut-to-size plastic and wood to get the job done. Whether you’re looking to protect your furniture from mucky paws or replace your shed windows, we have the materials to make it happen.
If you’re struggling to get the job done, whether that’s replacing those tired shed windows or maybe you’re unsure whether to use polycarbonate or acrylic for your next household DIY challenge, we’re here to help. If you have any questions, get in touch today.
Alternatively, head to our blog to explore a huge range of handy articles, guides and more.